Exploring Nature´s Microcosm - Part 1
Drawing Plants using a Binocular
Have you ever paid attention to the beauty of the tiniest treasures nature has to offer?
In this episode, we'll explore the intricate details of nature's microcosm and unravel the magic behind the lens of a binocular.
Join me as we embark on a creative endeavor that began with a weekend course and unfolded into exhibiting my drawing in an Online Exhibition, celebrating the “Beauty in the Details”.
A Weekend - a Course
It is so fascinating, what you can find in nature when you just take your time and take a look at the smallest, tiniest things that can be found, such as lichens, the venation of leaves, seeds and so much more.
So when I found out about a course on how to make scientific illustrations using a binocular, I was hooked.
Together with a dear friend of mine, who is also enchanted by nature's microscopic wonders, I decided to take a deep dive into the world of botanical art using a binocular - a totally new tool for us.
At the Faber-Castell Academy, guided by our fabulous educator Yasumin Lermer, we embarked on a journey that would forever change the way I perceive nature and create art.
At first we were introduced to the microscope, a binocular to be precise. It took me a bit to find out how it works and what adjustments you need to make in order to effectively work with it, but Yasumin was a great teacher and helped us with everything.
She also brought some objects with her, like irises and other flowers, that we could explore by dissecting it and scaling every tiny part of it up under the “bino” - how she called the binocular.
We made some sketches, prepared new material to scale it up, measured plant parts and again sketched and made notes to get familiar with the process of drawing with our new tool.
For us this was like a playground, revealing fantastical structures that the naked eye could barely fathom.
But the real adventure kicked in when we decided to scale up a chard seed and a seed of marigold.
The Choice of the Object
Choosing our subjects was no walk in the park.
We could have drawn many things, as so often the agony of choice.
We wanted to draw seeds; that much was clear to us. Only, we didn't have any.
Then the idea came to us to look for seeds at the local hardware store. And indeed, the hardware store offered a variety of seed packets, from which we bought several.
Vegetable seeds, flower seeds, and wildflower mixtures made it into our shopping basket.
The next day, we briefly inspected all the seeds under the "Bino" - they were all naturally beautiful in their own way.
Eventually, my friend chose a marigold seed, and I was fascinated by a chard seed, as it reminded me of a tiny planet.
At that point, it wasn't about scientific representation for me anymore; it was about this particular seed catching my eye, and I was determined to draw it.
The First Steps to Master
What was to be done to depict this little chard seed in an enlarged drawing?
First and foremost, it's about getting thoroughly acquainted with the object, meaning examining the seed from every perspective and trying to understand its structure before deciding on the final perspective to draw.
To keep the seed securely in place, preventing it from slipping or rolling, I affixed it to a small piece of kneaded eraser. Surprisingly, it worked remarkably well!
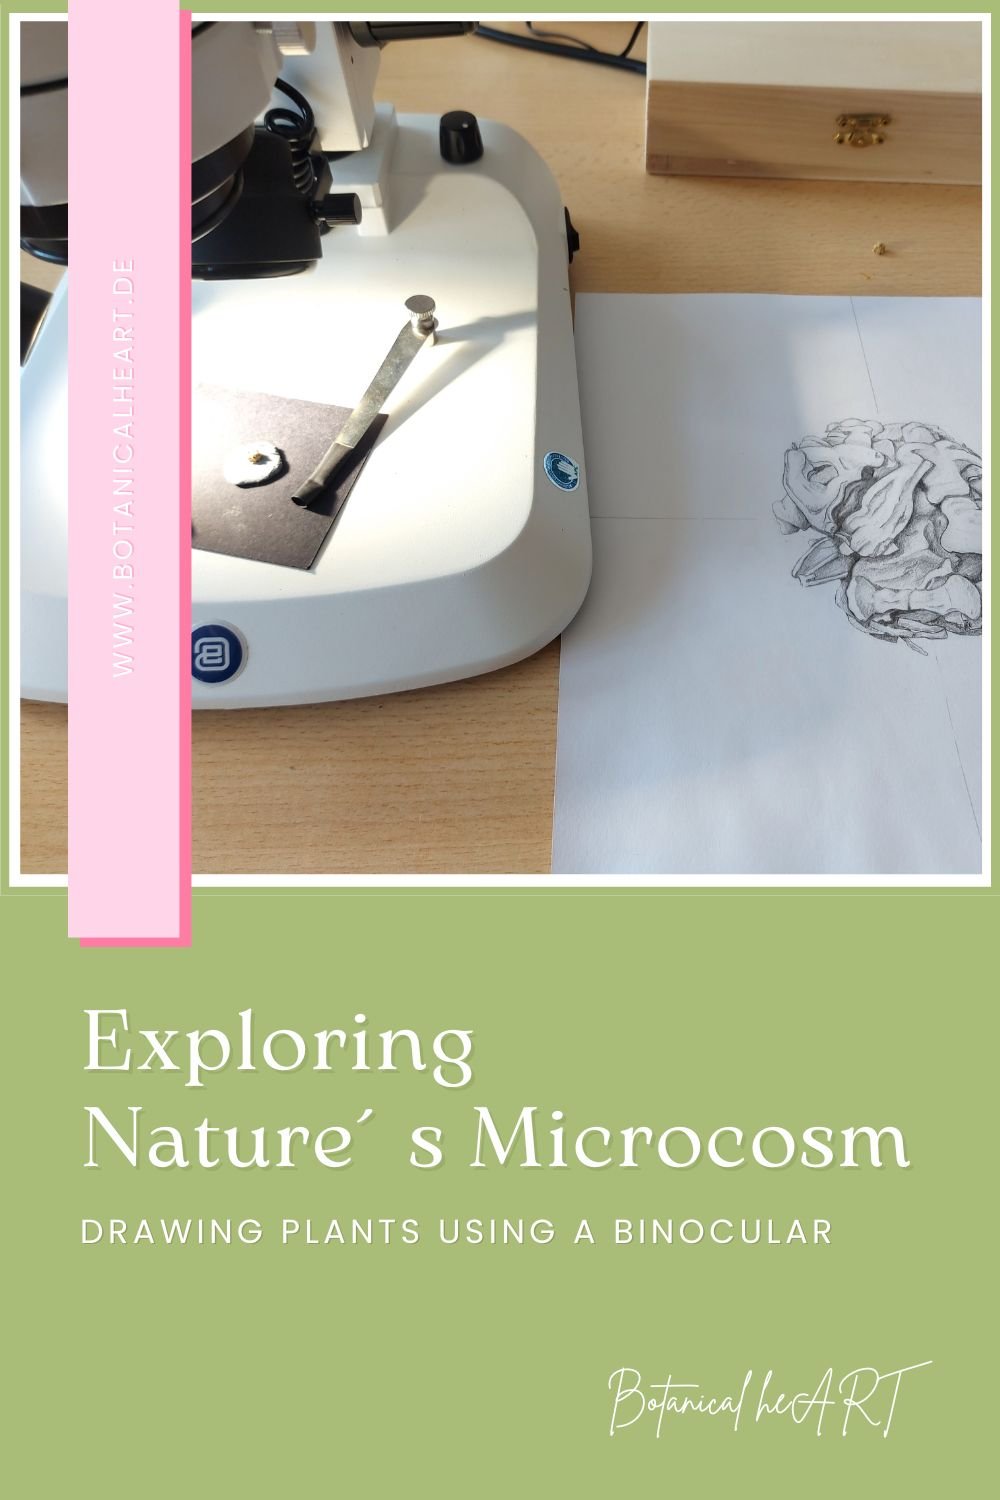
Since the small seed has a rather complex structure, I needed to use a grid for assistance. To do this, I simply pressed a small cross into the kneaded eraser with a scalpel, as you can see in the first image below.
In the second image, you can see what it looked like under the microscope and how tiny the chard seed actually was. After measuring the seed and making the necessary notes, I considered the size I wanted for the drawing and then multiplied the dimensions accordingly.
In my case, it was a 10x magnification. In Image number 3, you can see that I also drew the cross on my sketch paper as a guide and then captured the shapes based on that.
Especially in the beginning, this process involves erasing, measuring again, and redrawing—it takes some time until the sketch fits. Finally, I roughly sketched out the light and shadow or the tonal values.


Here's a brief overview of the individual steps:
Examine the object from every perspective.
Find the most pleasing perspective for the object.
Secure the object in place to prevent movement.
Draw a grid for orientation.
Measure the object.
Transfer the grid onto sketch paper.
Multiply the measurements.
Create an initial sketch.
Capture contours, highlights, and shadows for the future artwork.
This preliminary sketch served as the foundation for my final botanical drawing.
I barely managed to finish my sketch just in time as the workshop weekend unfortunately came to an end.
I should say, thankfully, I barely finished in time because, at that point, I didn't have a binocular at home, and creating a preliminary sketch would have been quite challenging.
Here, you can see the result of my workshop preliminary sketch. The small chard seed is on the paper in the top left corner.

In the next episode, I'll tell you how the drawing at home unfolded without a binocular and without further guidance from Yasumin, how I decided on the next steps, and how I completed my little chard planet.
Want to stay up-to-date and not miss the continuation?
No problem, sign up for the newsletter right away!